Thursday, December 19, 2013

Butter Burgers


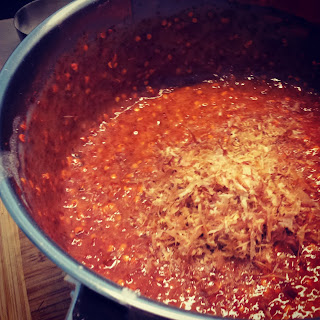
BBQ season well and truly on us it’s time to get the covers off, clean up the winters neglect and get grilling. I love getting a few burger patties on the grill, don’t have to worry about smoking the house out and you get a nice char only really achievable on a BBQ, even better if you have a charcoal grill. I like to keep the patties quite simple, salt, pepper and good beef, don’t knead it to much but gently shape it so it’s just holding together. To really gild the lily I’ve take to folding in grated frozen smoked butter, it adds a great flavour to the burger and of course makes it extra luxurious too.

Friday, November 29, 2013

Duck Confit


When life gives you the opportunity to buy 4 ducks legs for a completely crazy price of $10, those moments should be embraced, I was at, of all places, the local supermarket in Karori where I spied a pair of packets of a pair of duck legs heavily reduced by a third because the expiry date was looming. I swear they never sell at this supermarket and sit in the fridge until they are reduced. So they were swiftly procured with the aim to cure and confit. Small problem was the lack of duck fat, but no matter the legs got deposited in the freezer until I managed to pick some up, which I also managed to snap up cheaply at Moore Wilson’s bulk section, they sell duck fat frozen a lot cheaper than they do ‘fresh’.

I’ve previously posted about sous vide duck confit, but this time I wanted to do it traditionally and also give this lot a chance to age submerged and protected in its fat, so at the moment I have four portions in the fridge and an agonising wait for at least a month before I dig beneath the lush white fat and dig out a leg or two.


Duck confit is simple to prepare just a little planning and patience, but it’s all pretty much hands off work. You’ll need enough Kosher salt to coat the legs, I used about a cup, and a good bunch of thyme. In a bowl bash the thyme and salt together to release the aromatics, toss the legs in the salt and pat on the salt, then in a dish just large enough to fit the legs in a single layer make a bed with the thyme and enough salt to cover the bottom, lay the legs in the dish and pat on any remaining salt, make sure all the flesh is covered. Cover the dish in clingfilm and refrigerate for 24 hours.


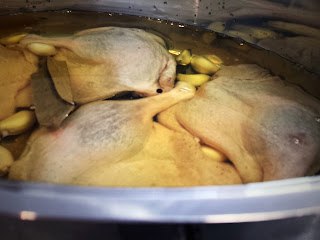
Remove the duck from the salt, rinse and thoroughly pat dry with some paper towels or clean tea towel, place the legs in a ceramic or non-reactive metal oven dish just big enough to hold them. Scatter over a couple of bay leaves, peppercorns and peeled cloves of garlic. Heat enough fat to cover the duck in a pot to 100°C. Carefully pour the fat over the duck and place the lid on the dish, or cover in tinfoil. Put the dish in an oven preheated to 100°C and cook for 4 hours. You can tell it’s cooked when the flesh is pulling away from the bone.


Remove the dish from the oven and leave it somewhere until it’s cool enough to handle. Carefully remove the legs from the fat and place them into a sterile container. Ladle the fat through a sieve into a bowl, be careful not to disturb the layer of liquid on the bottom it will spoil the confit, it is confit jelly and is an amazing stock for sauces, pour enough fat over the duck to submerge it and then cover with some clingfilm and leave to until cool enough to transfer to the fridge, any left over fat can be frozen and reused for the next batch of confit or roasting potatoes, you should get a couple of confits out of it before it becomes too salty. Pour the jelly through a sieve into a container and refrigerate.

The confit should last six months in the fridge, and I’m planning on aging my batch for a month, but you could just refrigerate overnight and cook the next day. When ready to eat the lush legs remove the confit from the fridge a couple of hours before to let the fat soften, preheat the oven to 220°C, carefully dig the legs out and gently scrape off any excess fat, place skin side down on a very hot oven proof sauté pan and cook for 5 minutes, the skin must be crisp, place in the oven and cook for 5–10 minutes.

Tuesday, November 19, 2013

Mustard


Why have I not made my own mustard before? I have no idea. Well I’ve made up mustard from powder with a little water or wine, but not from the whole seeds, not properly. It’s dead simple too, it takes all of 10 minutes, well that and 48 hours of waiting and couple of weeks for it to age into something you actually want to eat, as it is rather bitter fresh.


Pour into a bowl half a cup of brown mustard seeds, used for the heat, and half a cup of yellow mustard seeds, add 1 cup of liquid, I used some leftover sparkling wine, 200 ml of white wine vinegar, add a dash of salt, cover with clingfilm and leave for 48 hours. After the long agonising wait pour the mixture into a blender, add some sugar now if you want, I prefer not to, and whizz up for about a minute, it won't form a smooth paste but rather semi whole grain. Transfer the mustard to a sterilised jar and keep in the fridge for a few months, leave it a week or two before you start eating it as the bitterness will dull as it ages. I also imagine you could can it if you wanted to keep it indefinitely, but I don’t know what the heating process would do to the flavour development.

Wednesday, November 6, 2013

Lamb heart with salsa verde


With offal becoming more mainstream I am beginning to see a wide range of some quality offerings up front and centre of all places at the supermarket. I was picking up a few things for dinner as the other half was out for the night when I spied some rather tasty looking lamb hearts, and a bargain too, knowing full well I’d be pushing water uphill if I ever tried to offer up some to her it seemed like providence, so they were grabbed up.


I decided to keep things reasonably simple, the heart is cleaned and broken down, arteries, valves  sinew and little blood clots removed. The pieces of meat set aside as I prepared a simple salsa verde, very finely diced parsley combined with garlic and white anchovy broken down to a paste with a back of a knife, lemon juice, salt, pepper and good quality olive oil. Let the salsa sit as long as you can, the more time you give it the better the flavour will be.


The heart meat was tossed to lightly coat in some oil, and then a little salt and pepper sprinkled over, then the pieces were cooked medium rare like a steak in a screaming hot pan for probably not even a minute a side, but depends on how big the piece is. As I was just serving myself, I was a bit little rustic on the presentation, a good schmear of salsa down on a board, and each piece of meat sliced to show of it’s juicy interior then arranged on the salsa verde, a little pile of salt and pepper to adjust the seasoning as you need it.

Friday, October 25, 2013

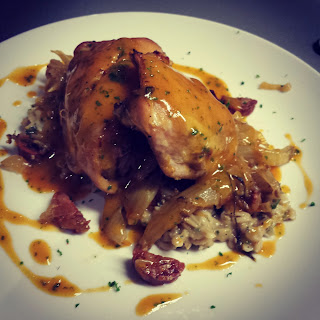
Savoury oats with braised fennel and chicken


Oats aren't just for breakfast. A savoury concoction can be made by easily substituting milk or water for chicken stock and maybe simmering with a little shallot and garlic. It takes a little to get your head around the fact that the silky lush and oh so meaty tasting concoction are oats, or perhaps it’s just me the has them relegated to the humble position of if cooked in liquid it’s porridge and should be sweet. Other grains such as rice don’t seem to have the problem, rice as a carb on a plate for dinner, or congee a savoury porridge, or as rice pudding a sticky sweet mess, so why not oats?

Savoury Oats
One cup of oats with a diced shallot and two cups of chicken stock are added to a pot over a low heat, stir occasionally to begin with and bring to a gentle simmer. Cook for about 20 minutes, stirring more frequently as the oats thicken. They’re cooked when thick creamy and soft but still with a bit of bite, not sludge. Stir through fennel fronds and a splash of good olive oil. Season with salt.


Fennel Braise
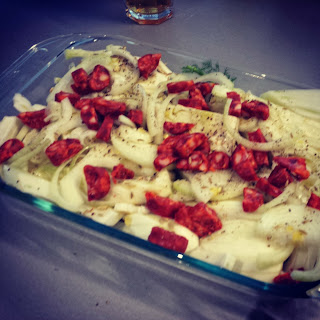
Cut whole fennel into wedges, finely slice an onion, dice a spicy chorizo and toss together in an oven dish, sprinkle over salt and add a generous splash of sweet vermouth, about quarter of cup, cover tightly with foil and bake at 150°C for about two–two and one half hours. The fennel should be meltingly tender but still holding its shape, not a mushy mess.

Chicken
Season and brown chicken thighs all over and add to the braising fennel dish for the last 30–40 minutes.


Sauce
Drain the braising liquid into a saucepan and bring to a very low simmer. Make a paste of one teaspoon arrowroot and two teaspoons of water. Remove the pot from the heat and whisk in the paste. If it doesn't thicken straight away put it back on the heat and stir constantly, it will thicken quickly.

Wednesday, October 9, 2013

Asparagus with Egg and Soy Butter Sauce


Eggs are placed in 75ºC water for 13 minutes, then removed to an ice bath to stop the cooking process. Meanwhile asparagus is sliced in two, beans top and tailed and likewise cut into manageable portions and spinach sliced. A pot put on a low heat with a good portion of butter and generous pinch or three of pepper added, soy sauce is swirled into the melted butter. The eggs now move to 60ºC water to heat through for 10 minutes. The vegetables are sautéed in a little butter, and when cooked tossed with a little bit of the soy-butter. A nest of greens placed in the bowl, a warmed through egg cracked and slid out to nestle in place, a glaze of soy-butter spooned over and around and finished with a sprinkling of bonito flakes.

Friday, September 27, 2013

Hand pulled noodles


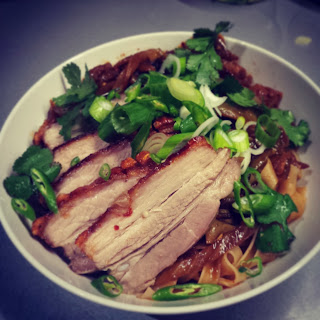
Pork sautéed with fermented black beans and spicy fermented cabbage on a bed of hand pulled noodles.

If my instagram feed and meals of late are anything to go by you’d be forgiven for thinking that I’ve gone a little bit noodle mad, and well I guess I have. But it’s probably more that I made a large batch of hand pulled noodle dough and it freezes and thaws well. So you’ll have to forgive what is almost a repost of a recipe, but this one has more pretty pictures!

Noodles (enough for 4 portions)
400 g Flour, high gluten such as bread flour
240 ml Water
6 g salt (dissolved in the water)


Tip the flour into a large bowl and make a well in the centre. Pour in the water and mix to form a ball of dough. Don’t worry about mixing it too much, it doesn’t need to be a smooth ball of dough. Cover with cling film and let it rest for 15 minutes.


Place the dough on a clean work surface and start to roll out into a log about 60cm in length, take one end and fold it in half to the other end, repeat the rolling and folding for about 15 minutes, giving it a chance to rest for a couple of minutes every five or so. The dough should be very smooth by now, if not keep kneading. Place the dough in a clean bowl and cover with cling film, let it rest at room temperature for a hour.


Take the dough and shape it into a rectangle about 10 cm wide and 3–4 cm thick, cut off a 1 cm slice, so you should have a rough rectangle of dough 10 cm long, 3 cm wide and 1 cm thick, coat the slice in a neutral oil, such as Canola or rice bran, lay the piece on a tray. Repeat until done. Cover the tray with cling film and place in the fridge for a hour.

Tip: Now is the stage to freeze off portions if you wish to do so, lay the portioned noodles between sheets of baking paper and in an airtight container/bag/cling-film. Just take out of the freezer 20 minutes before you’re ready to pull and cook the noodles.


Take the dough out of the fridge ten minutes or so before you want to cook, and have a large pot of salted water on the boil, you want to stretch the noodles and get them straight into the pot, this is best done one serving at a time, so don’t try and do the whole lot at once, five pieces is a pretty generous serving size.


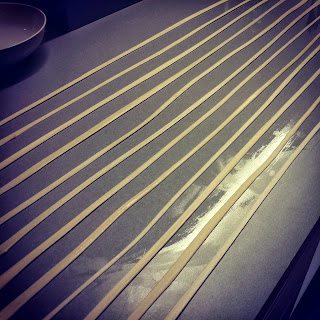
Take a piece of dough and start to stretch it out holding one end in each hand and oscillating it up and down as you go, slapping it against the bench. Sounds a bit weird, but easy once you’ve got the hang of it. Lay the pulled noodle out on the bench and move on to the next. Once the serving of noodles have been pulled, gently roll a rolling pin over the noodles, don't really use any pressure just let the weight of the pin help even out the noodles.

You can either cook the noodles as they are in salted boiling water, which I think is my preferred way or you can take one end of a noodle and tear it down the middle right to the other end, but don’t tear it in two leave it as one long noodle, cook in boiling salted water for about 3 minutes, once they float to the surface they’re done.


A must have condiment for any noodle dish, chilli oil. Pretty damn easy to make too, Chilli, oil, salt and xanthan gum (0.5%) blended together.

Friday, September 20, 2013

Slowly does it


Well I haven’t really stepped back into the kitchen as yet, maybe still on holiday time, or just lacking a little enthusiasm. I dipped a toe with trying my hand at pulled noodles, which was a fortunate little spark of inspiration, and started a mini affair with all things noodle. So not so much a full on epic of a post that I sometimes rant on about something but a little tiny post of a rice noodle dish that I whipped up on a whim that went down a treat. It uses my now new favourite ingredient, black bean chilli sauce, fermented black beans in a fiery hot chilli oil.

Pork belly and roasted fennel noodles.
Pork Belly
2 Large fennel bulbs
1 Large onion
Black bean chilli sauce
Cooking rice wine

Garnish
Spring onions, sliced
Green chilli, sliced
Coriander
Sprouts, loving radish sprouts at the mo.

Slice the fennel in half and then into wedges, and slice the onion in half and into slices, toss through the black bean chilli sauce and cooking rice wine. Make a bed in a roasting pan with the coated vegetables and place a seasoned scored pork belly on top.

Place into a 220ºC preheated oven and then turn down to 160ºC, cook for about 3 hours. You will need to take it out of the oven now and then to toss around the fennel mix so it doesn’t burn.

Remove from the oven and tip the fennel mixture and cooking juices into a large bowl, cover and set aside, place the pork back in the roasting dish and crank the heat up in the oven, put it back in for about 10 minutes so the rind gets a chance to puff up.


While the pork is cooking, get some noodles onto the boil. Adjust the seasoning of the fennel mix, I ended up putting in a little fish sauce and rice vinegar to balance it.

Take the pork out of the oven and let it rest. When the noodles are cooked drain them and toss them in the fennel mix.

Take a portion of noodles, dripping with all the fennel cooking liquid, and make a bed in a bowl with them, make sure to get a decent portion of the beautiful caramelised fennel in there too. Slice up the pork and lay on top of the noodles, garnish to your hearts content and devour.

Tuesday, September 10, 2013

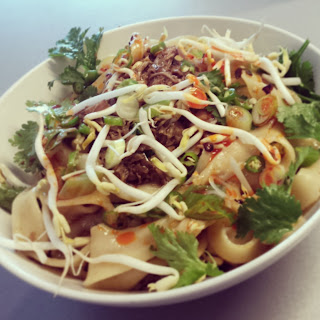
Cumin lamb with hand pulled noodles


Finally back from holiday, a week of sun and lounging next to a pool with a cocktail in hand, life was hard, however the cool Wellington weather snapped me back to reality as soon as I stepped out of the airport, gone was the hot 30ºC sunny weather. Unfortunately I didn’t come back with just photos and good memories of the much needed break, I was also covered in jellyfish stings which I sustained on the last day snorkelling through a rather dense patch of their larvae. So after a few days recuperating I set my mind to the next kitchen project. It came together serendipitously as much of my ideas do, I was at Yans supermarket stocking back up on the usual suspects, tapioca starch, fish sauce, rooster sauce and the like, and then killing a little time at the butchers next door waiting for the other half, when I spied a rather good looking, and dirt cheap, lamb fore-quarter. My mind shot back to my last trip to Auckland and Xi'an Food Bar with their amazing hand pulled noodles. I went into research mode, and hunted down methods and recipes, which are a bit lacking in detail online, so this is my version muddled together from many sources, one person's way to knead, someone else's resting times, and quantities fudged by me from what I could find. There are so many recipes just saying ‘enough’ water. How much is enough? Fundamentally it’s just flour and water so surely the ratio is important. I ended up deciding on 60% hydration (10 parts flour 6 parts water), when I first started out I thought it may be a bit dry but with the resting steps the flour hydrates and becomes soft, pliable, and incredibly stretchy with the kneading method.

Noodles (enough for 4 portions or 2 very very generous servings)
400 g Flour, high gluten such as bread flour
240 ml Water
5 g salt (dissolved in the water)

Tip the flour into a large bowl and make a well in the centre. Pour in the water and mix to form a ball of dough. Don’t worry about mixing it too much, it doesn’t need to be a smooth ball of dough. Cover with cling film and let it rest for 15 minutes.


Place the dough on a clean work surface and start to roll out into a log about 60cm in length, take one end and fold it in half to the other end, repeat the rolling and folding for about 15 minutes, giving it a chance to rest for a couple of minutes every five or so. The dough should be very smooth by now, if not keep kneading. Place the dough in a clean bowl and cover with cling film, let it rest at room temperature for a hour.

Take the dough and shape it into a rectangle about 10 cm wide and 3–4 cm thick, cut off a 1 cm slice, so you should have a rough rectangle of dough 10 cm long, 3 cm wide and 1 cm thick, coat the slice in a neutral oil, such as Canola or rice bran, lay the piece on a tray. Repeat until done. Cover the tray with cling film and place in the fridge for a hour.

Take the dough out of the fridge ten minutes or so before you want to cook, and have a large pot of salted water on the boil, you want to stretch the noodles and get them straight into the pot, this is best done one serving at a time, so don’t try and do the whole lot at once, four or five pieces is a pretty generous serving size.


Take a piece of dough and start to stretch it out holding one end in each hand and oscillating it up and down as you go, slapping it against the bench. Sounds a bit weird, but easy once you’ve got the hang of it. Lay the pulled noodle out on the bench and move on to the next. Once the serving of noodles have been pulled, gently roll a rolling pin over the noodles, don't really use any pressure just let the weight of the pin help even out the noodles.

Now for the fun bit, take one end of a noodle and tear it down the middle right to the other end, don’t tear it in two leave it as one long noodle, get them into the boiling water and cook for about 3 minutes, once they float to the surface they’re cooked.


Here’s a good video to show the method of stretching out the noodles, and hey it’s got Andrew Zimmern in it.

Cumin Lamb
1 fore-quarter of lamb or shoulder roast
Cumin
Chilli flakes
Garlic
Salt
Prickly ash (Szechuan pepper)
Rice bran oil
Black Bean Chilli sauce, literally chilli oil with fermented black beans in it.

I had a pretty awesome fore-quarter of lamb, I ended up removing the neck and fore shin for a later use, but a decent shoulder cut should do the job too.


In a blender combine 3 parts cumin, 1 part chilli, 1 part prickly ash, a good tablespoon of salt, 6 or 7 cloves of garlic, a good portion of a jar of the black bean chilli sauce (about a cup and a bit) and a little extra oil. Blitz until it forms a rough paste.


Make slashes in the fat on the flesh side of the meat and generously rub the paste all over the lamb. Wrap tightly in a few layers of cling wrap and leave it to rest overnight in the fridge.


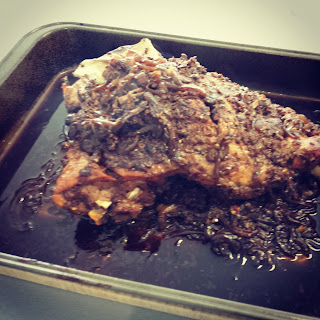
Preheat the oven to 220ºC. While the oven is heating remove the lamb from the fridge and let it sit on the bench for about 30 minutes. Slice up a few onions and make a trivet in a roasting pan with the slices and some coriander, add a splash of cooking rice wine. Lay the lamb on top of the onions, cover tightly with tin foil and place in the heated oven, turn the temperature down to 150ºC and cook for 4 hours 30 minutes.

Getting it all together
Remove the lamb from the roasting dish, carefully, wrap it in tin foil and set aside to rest and also to cool down a little so it can be pulled apart a little easier. When it’s cool enough to handle remove all the bones and roughly shred with a fork. Cover and set aside.


Strain the cooking liquid into a pot with some chicken stock, a 50/50 mix of stock and cooking liquid is good, bring to a simmer and reduce a little, taste and season as you like, I added a little extra chilli. There will probably be quite a bit of fat in the sauce so you can skim it if you like, I skimmed quite a bit off and then tossed it through the shredded meat, a bit decadent.

Get a few containers of garnishes ready it will make plating up much easier, coriander leaves, sliced chilli, bean sprouts, lime, chilli oil, sliced spring onion.

Serving
Place a ladleful of the sauce into a large bowl along with a portion of lamb a few coriander leaves and chili slices. Get the noodles pulled and into the boiling water, when cooked pull out with tongs and toss in the bowl with the lamb, transfer it to a serving bowl and garnish with extra coriander, chilli, bean sprouts, spring onions and chilli oil, or whatever else you have. Get the next portion on the go.

Wednesday, August 21, 2013

Peas and Lettuce

Well a quick little post before I get on a plane and spend a week on an island lounging next to a pool with a book in one hand and a drink in the other.
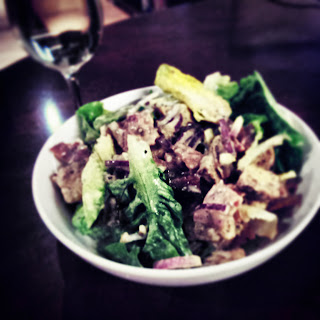


This is a great little side dish that’s packed full of flavour and a novel way of serving lettuce, or it can be made a bit more substantial and turned into a light meal with the addition of a poached egg (or 13 minute egg). There’s not a whole lot of prep that needs to be done, and it all should be easy to knock off while the egg gently cooks.

13 minute egg
1 Baby Cos, sliced crosswise into 1 cm strips
2 rashers of streaky bacon, diced
Handful of frozen peas
half a cup of chicken stock, use less if it’s already reduced
Mustard, a good spoonful
Shallot, very finely diced
Anchovies (to taste), minced


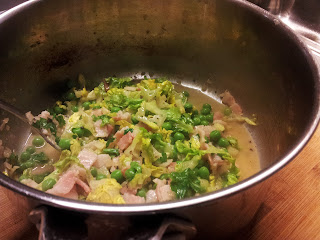
Sauté the onions and bacon in a little olive oil, try not to colour it too much, when cooked through add the anchovies and cook until amalgamated. Pour in the chicken stock and add the mustard, simmer until it has reduced by about half. Add the peas, and when almost cooked add the lettuce and simmer until it has become limp, take care not to overcook the lettuce. Season with salt and pepper and serve in a bowl with the egg placed in the centre. The runny yolk mingles with the stock and creates a lush sauce.

Friday, August 16, 2013

Cookies


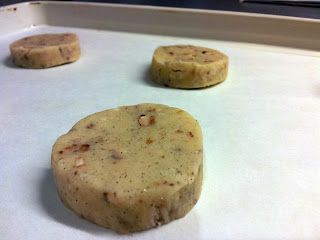
This is pretty much my go to recipe for cookies, these are not ooey gooey chewy cookies, they have a good snap and are perfect for dunking. Rolled into a log and wrapped tightly it freezes extremely well, meaning you can slice off rounds (with a hot knife) and have fresh biscuits cooked in about 10 minutes, no need to cook up the whole batch at once. Rounds rolled very thin and baked nice and crisp also make a great ice cream sandwich.

100 g butter
200 g sugar
200 g flour
1 egg
1/2 tsp baking powder salt

Cream the butter and sugar until pale light a fluffy, beat in the egg. Sieve in the flour, baking powder and salt, and work into the batter, this is also the perfect time to add any extras such as chopped nuts or chocolate, try not to overwork the dough.


Tear off a large rectangle of cling film and place the dough in a rough log shape in the centre, use the cling film to tightly roll up into an uniform log, a second layer can help. Place either in the freezer for future use or in the fridge for at least half an hour before slicing and baking for about 10 minutes in a preheated 180ºC oven. Cool on a wire rack, well that is if you can wait for them to cool before devouring.


When making cookies for an ice cream sandwich I’ll take a ring mold and press ice cream into it on a sheet of baking paper, then transfer to the freezer. Then slice a round of the cookie dough off and roll out with a rolling pin so it’s a little larger than the ring mold and nice and thin. Cook it just as above, but keep an eye on it as it will cook a little quicker.

Thursday, August 8, 2013

Caesar Salad


Whenever I make up a batch of 13 minute eggs I usually make a couple extra so they can sit in the fridge and be used over the next few days, it seems like a waste of effort to only make one or two when I need them, plus they make a great Caesar Salad dressing. Well my version of a Caesar dressing on my version of the Salad, an easy toss together lunch or light dinner and a great way to use up a glut of cos lettuce.

Dressing
1 very soft egg (13 minute egg)
1 tsp hot mustard
Juice of one lemon
rice bran oil, to start the emulsion
olive oil, to bulk out
salt
pepper
cayenne

Use a whisk to break up the egg, stir in the mustard, whilst whisking slowly, drip-by-drip, pour in the rice bran oil, once a stable emulsion has been formed switch to olive oil, I usually end up using about a fifty-fifty mix of oils, add the lemon juice, salt, pepper and cayenne pepper to taste.

Salad
1 baby cos
Streaky bacon
croutons
red onion

Well it’s all prep and assembly really, firstly I like to cook the bacon, starting in a cold oven to help the fat render, cook it until it’s nice and crisp or as Agent Dale Cooper would say “Bacon, super-crispy. Almost burned. Cremated.”[1] Remove the bacon from the oven and drain on paper towels.

Using the same tray, toss cubed bread in the hot bacon fat and put in the oven until the bread is golden and crunchy.

Thinly slice the red onion, much like anchovies you’re either a fan of raw onion or not, I love it.

Separate the lettuce leaves and thoroughly wash set aside to drain.

Building the Salad
Garlic confit (or slow roasted garlic)
Anchovies

If you’re making the salad for more than one, and perhaps not everyone appreciates anchovies for  just how awesome they are, this is a simple way to customise the dressing for each serving. So in a clean bowl put in some minced anchovies, to taste, along with a clove or two of some garlic confit, mashed, a large spoon or so of the dressing and mix through.

Build up the salad putting in enough leaves, bacon, croutons and onion to satisfy and gently toss through the dressing.

Wednesday, July 24, 2013

Spring onion Kimchi


Well I had plans to make another batch of kimchi, the last lot of the fiery fermented cabbage has all but disappeared from our fridge, but wanting to keep the peace and not wanting to devote as much of our tiny fridge space to three very large jars of cabbage, nor the week of wondrous aroma that fermenting cabbage and shrimp paste adds to the general smells of the house, I opted for a much smaller batch, a one litre jars worth, and instead of having spring onion as the background vegetable it would be replacing the cabbage entirely.

Spring onions, enough to tightly pack your chosen jar
½ cup garlic
Thumb of ginger
½ cup fish sauce
1 cup hot chilli flakes
½ cup glutinous rice flour (also called sweet rice flour)
3 cups water
¼ cup sugar
1 tbsp belacan (a shrimp paste)
3 g Bonito flakes (optional)


The night before, trim the spring onions so they are about a centimetre or two shorter than the height of the jar, reserve the green parts as they will be puréed later. Fill a large bowl with water and add enough salt to make a 5% brine (50 grams per litre), submerge the trimmed spring onions and weigh down with a plate or two, leave overnight.


The next day, pour the 3 cups of water, rice flour and sugar into a pot and bring to the boil, this will thicken up pretty quick, keep stirring until it forms a thick smooth paste. Tip out into a bowl and leave to cool.


While the the rice glop cools, in a blender combine the garlic, ginger, greens of spring onion, fish sauce, and belacan, whiz until it forms a smoothish purée. Mix into the now cool glop along with the bonito and chilli flakes.

Now is the time that if you don’t have some gloves you’ll wish you did, drain the spring onions and dump into the fiery red fishy gloppy paste and make sure they all get a good coating, transfer them to a sterile jar, then top up with the paste leaving a little head room in the jar but making sure that the spring onions are covered, place on the lid loosely and move to somewhere cool and dark for 3–6 days so the fermentation can begin. After about 6 days tighten the lid and transfer to the fridge.


I’m not sure exactly how long it will last in the fridge ‘until it’s gone’ is my best answer, and I do prefer it to age a little before I crack the jar and start eating, so up to you whether or not you plough into the fiery spring onions straight away or not.

Wednesday, July 17, 2013

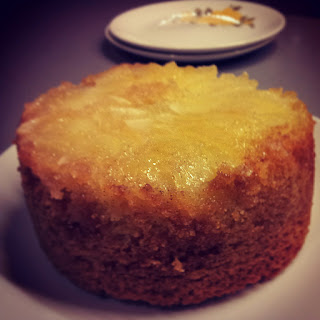
Upside down apple cake


125 g Butter
125 g Sugar
1 Egg
1 tsp vanilla paste
1/2 tsp salt
50 g Cornflour
75 g Wheat flour
1 tsp Baking powder
1 Apple
Sugar and Butter to coat
  • Preheat the oven to 170ºC.
  • Grease a large ramekin with butter and sprinkle sugar on the base.
  • Peel and slice the apple very thinly, I prefer to use a mandoline for this.
  • Arrange the apple slices on the base of the ramekin.
  • Cream the butter and sugar together until the sugar has dissolved and the mixture is pale yellow and fluffy. Beat in the egg along with the vanilla.
  • Sieve in the salt, flours and baking powder, fold the dry mix in, take care not to overwork the batter.
  • Spoon the mixture into the ramekin and try not to disturb the apple layer.
  • Bake for 45 minutes, until a skewer inserted comes out clean.
  • Run a knife around the edge of the cake and turn out onto a plate. Enjoy with lashings of cream, whipped or not.

Tuesday, July 9, 2013

Smoked Carrot and Ginger Soup


Best laid plans and all of that! Well I had the bright idea of smoked carrot and ginger soup, smoke some carrots cook them in the pressure cooker with a little baking soda so they would caramelise and add a bit of depth of flavour, chuck a bit of ginger in there too, purée that up and hey presto tasty soup. Well, I was quite wrong, putrid foul orangey brown gunk that offended just about every sense one has, binned. The house ended up smelling of this smoky concoction from hell for the best part of a day. Not to be put off by hell carrots I started again, with a little smoky cheat, Al Brown’s Whitestone smoked butter would add that much desired smoky flavour to the soup not the carrots.

1 Kg Carrots
25 g Smoked butter
Thumb of Ginger
25 g Unsalted butter
1 Red onion
Coriander, root and leaves.
1 Scant tablespoon Peanut butter
Peanuts, toasted and crushed
Chilli flakes
Chilli oil
1% Xanthan Gum (1% by weight of the finished product)

Peel and dice the carrots, peel the ginger and slice into large chunks, clean the coriander root, peel the onion and slice into quarters. Place into a pot and barely cover with water, add the unsalted butter, bring to a simmer over low heat and cook covered until the carrots are tender.


Strain the carrots (keeping the liquid), place the coriander root, onion and ginger root along with the cooking liquids into a pot and start slowly reducing the liquid.

Work the cooked carrots through a mouli and sieve, I did this a couple of times to get super smooth purée. Use some of the reduced cooking liquid to loosen the purée to the desired consistency.


Place the soup in a blender, add the smoked butter, peanut butter and chilli oil (to taste), start the blender, when a vortex forms sprinkle in the xanthan gum, let it run for about 30 seconds.

Pass the soup through a sieve into a pot, season with salt as needed, heat to desired temperature. Serve. Garnish with finely sliced coriander, roasted peanuts chilli flakes and chilli oil. I went a little further with it and made a crab meat salad, crab meat, sliced coriander leaf, toasted peanuts, chilli flakes and oil tossed together and placed in the centre of the bowl.

Thursday, June 27, 2013

Mac and Cheese Sliders


Mac and Cheese isn’t really considered healthy, and well it is pretty much starch with starch with cheese, so not really helping out with the 5+ a day vegetable intake that is recommended. So why not gild the lily and coat patties of Mac & Cheese in some tasty potato starch (instant mash potato), fry the little cheese pasta goodness and slide it into a soft bun with some hot sauce and lettuce. Why not indeed, a total carb overload, bread, pasta, flour based sauce, not at all bad for you, well not your taste buds anyway.

Macaroni
Cook to the packets instructions, I prefer the small elbow to the large. Take care not to overcook. Strain and dump into a large bowl. I think I used about 300 grams of pasta.

Streaky bacon
Slice up into little lardons and place in a hot oven until the fat has started to render out and crisp up around the edges, don’t make it too crispy otherwise you’ll have little bacon bullets in your pasta. Tip the bacon, fat and all, on top of the strained pasta and stir through.

Cheese Sauce
750 ml milk (whole milk please)
Parsley
Bay Leaf
Thyme
Peppercorns
Onion (peeled and quartered)

Place all of the ingredients in a pot and put over a low heat, allow it to gently simmer for ten minutes or so, be careful not to scald the milk. Strain into a jug for easy pouring.

Over a medium heat melt 3 tablespoons of butter and then stir in 3 heaped tablespoons of flour, stir until the flour has cooked through, make sure not to colour the roux too much. Pour in a portion of the milk and whisk until it has incorporated and begins to thicken, repeat until all of the milk is incorporated. Cook until thick, stirring often. If the white sauce is lumpy, don’t worry just keep stirring and cooking, the starch in the flour will eventually hydrate and the the sauce will become smooth.

Remove the pot from the heat and whisk in an egg, and two cups of cheese, I like to use a combination of strong flavourful cheese and good melting cheese.


Pour the cheese sauce into the bowl with the pasta and stir through making sure it is evenly coated, taste and season as needed.

Now you can spoon this into a baking dish, top with some crumbs and cook in a hot oven for about half an hour and you’ll have some tasty mac & cheese, or you could wait for it to cool and transfer it to some containers and place in the fridge. When the mix has set and is completely cold remove from the fridge and spoon into ring molds, pressing down with the back of a spoon to make little slider patties, carefully coat each patty in potato starch (instant potatoes).


Heat a good amount of oil in a heavy based frying pan and cook the patties until they are golden brown on each side, you could probably deep fry if you wish but I find shallow frying works perfectly well. Allow the patties to drain on some kitchen towels and serve in a slider bun with shredded iceberg lettuce and hot sauce.